Well, not entirely the right idea. Not the home invasion, theft and vandalism parts of the story.
I'm talking about her impeccable taste and high standards.
You remember, don't you? Goldi was the gal who wasn't satisfied until things were "just right".
I'm betting that Goldi's family and friends thought that she was at least a little OCD. Probably more than a bit of a perfectionist.

Not that I can relate to those things.... at all.
Well, Okay, FINE, I'll admit it, I'm like that all the time.
I envision Goldi and I sitting at a Compulsive DIY'er Support Group with the three bears (and my immediate family) having staged an intervention after what had become known as "the chair incidents".
Goldi's reason for being there having involved a broken chair, mine involving the 10 that are currently in the garage instead of my car.
Hello, I'm Kimberly and I'm a perfectionist.
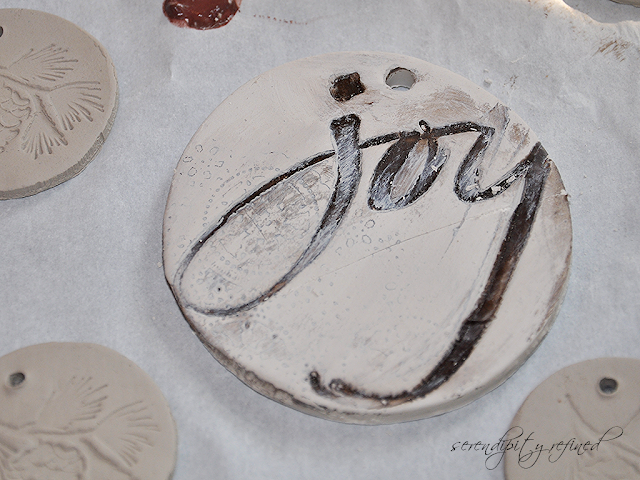
Exhibit 1,298,456: THE CLAY TAGS.
While I'm waiting for the basement to dry out from last weekend's sump pump failure and flooding in my finished basement, I've again been trying to perfect my clay tags.
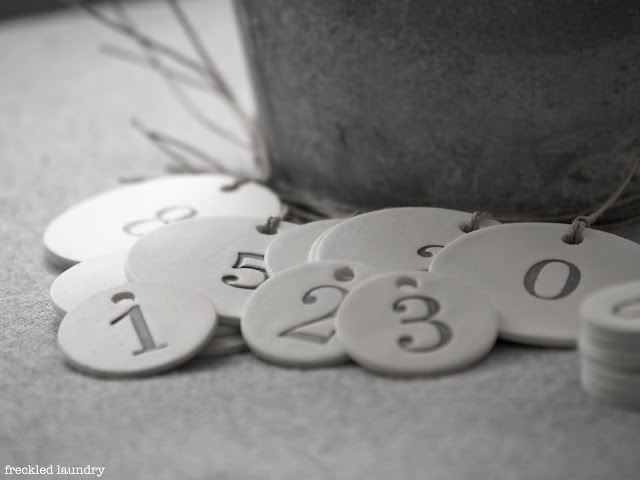
My friend, Jami, over at Freckled Laundry makes BEAUTIFUL tags! Simple, elegant, perfect.
 |
| PHOTO CREDIT, FRECKLED LAUNDRY |
I started making tags a couple of years ago and I haven't been entirely pleased with the results, yet.
At first, I made them from synthetic polymer clay.
It rolled out beautifully, was white as snow, and durable after it was baked. I used rubber stamps and hand painted them. They were nice but, when I read the label, I found out that what I was working with was a concoction of chemicals that had a warning on the label about adult supervision due to toxicity.
I prefer non toxic materials when they're available. I also didn't like the fact that the tags were really light weight when they were dry.
Next, I used natural, air dry clay. The color was a bit more grey but, the weight and feel of the tags was beautiful. It worked well with stamps, doilies and pieces of my arborvitaes. I hand painted them, wiped them with a damp cloth. The images were beautiful and the look was what I was searching for.
Vintage, Natural, "Farmgirl French".
Of course, since they were natural clay, the tags had to be sealed. I applied two coats of Matte Mod Podge. The tags were lovely, but very fragile.
Now, I'm working with yet another Natural Clay called Marblex. It's more durable and less brittle. It still has the same lovely gray color, still takes the stamps, paints and inks the same way. It also needs to be sealed in order to be waterproof but I've spoken to other tag makers who have used it with spray on polyurethane and they have had good success
I'm hopeful that Marblex will be "just right".
I'd love to be able to make some ornaments, wine bottle tags and gift tags before Christmas. Heck, maybe I'll even make tags to use as place cards for Thanksgiving!
Speaking of "just right", today, I'm working on this:
I've narrowed the choices for my basement replacement carpet to the three above. (That's a piece of my stair runner in the background.) Anyone care to voice an opinion?
CLAY TAG INSTRUCTIONS:
Follow package directions for the type of clay you use. Roll out to a thickness of 1/8 to 1/4 inch. imprint using rubber stamps, doilies, buttons, the sky's the limit! If you need to bake them, wait to hand paint until after baking. If you're planning to hang them, make a hole for the string or ribbon while the tag is still wet using a pin or a straw. Bake and/or seal if needed.
xo,


